Showing posts with label house. Show all posts

10.15.2013

{ KITCHEN: SOURCES }


1.    Williams Sonoma: Stainless-Steel Mixing Bowls with Lids, Set of 3
       Williams Sonoma: Stainless-Steel Prep Bowls with Lids, Set of 4
2.    Calphalon: Commercial Hard-Anodized 13-pc.Cookware Set, courtesy of Leslie's parents.
3.    Ikea: Grundtal Stainless Steel Shelf Wall
4.    Sand & Feather: Woven Bowl
5.    Crate & Barrel: Wüsthof Classic Ikon 8" Chef's Knife
6.    General Hotel & Restaurant Supply Store: Wüsthof Professional 10" Chef's Knife
7.    Fab: 10-Piece Knife Set Black
8.    Broan: Range Wall-Mounted Hood, available at  Lowes
9.    West Elm: Large Raw Wood Boards
10.  Anthropologie - Milk Bottle Measuring Cups, courtesy of our friends, the very talented Moniomi
11.  West Elm: Serving Bowls
12.  Animali Elephant Bottle Opener – Found this little gem at Su Casa while in Baltimore, but its also available at Nova68
13.  Journal and Books: Archie Grand: Chefs I’ve Met and Liked
        WestElm
14.  Crate & Barrel: Acacia Salt Cellar
15.  Ikea: Kryddig Spice Mill
16.  Ikea: Plates
17.  West Elm: Labeled Kitchen Storage Canister
18.  Ikea: Ekby Mossby Stainless Steel Shelf
19.  West Elm: Hanging Spice Rack courtesy of our friends, the Wintersess. We created the labels inspired by this awesome template.
20.  Target: Cake Stand
21.  GE: Café Range
22.  Ikea: Blankett Handle


23.  Etsy: Vintage Beef, Pork, and Lamb Butcher Charts
24.  Vigo: Stainless Steel Pull-Down Spray Kitchen Faucet
25.  Dax International: Undermount Stainless Steel Sink
26.  GE: Café Refrigerator
27.  GE: Monogram Built-In Oven
28.  GE: Profile Custom Panel Dishwasher

Unless otherwise stated, products and stores featured on this blog are not freebies or sponsors. While some are gifts from our friends and family; for the most part, we’ve bought these products and feature them because we love them. However, we are testing them along with you and are not responsible for their quality or durability.

10.07.2013

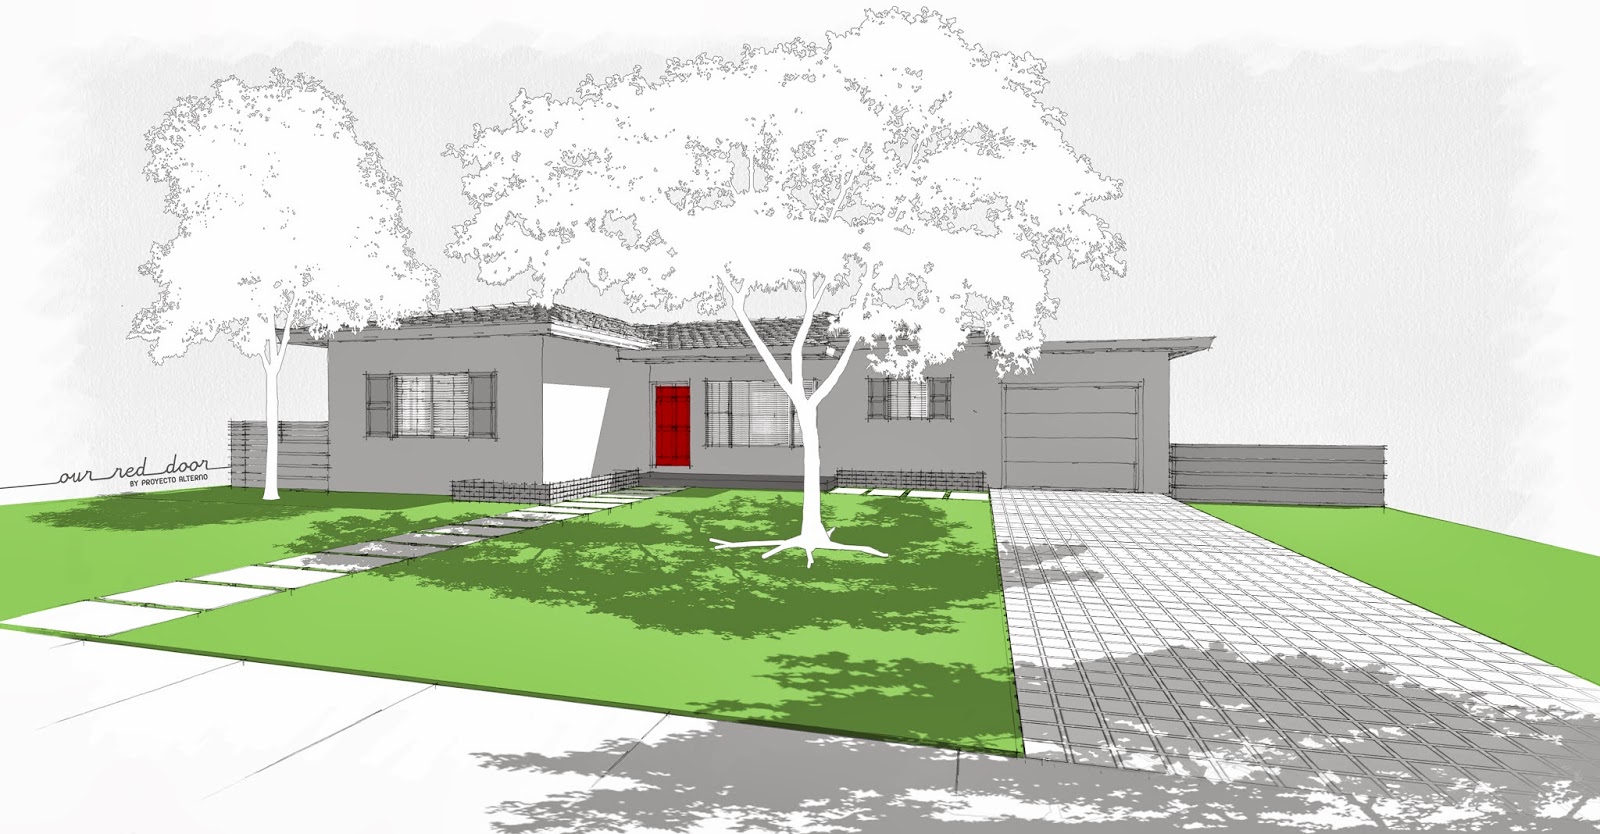
{ FRONT YARD: HARDSCAPE DESIGN }

…we’ve always loved Turfblock... yes, they are messy, high maintenance, and spotty (as in grass grows inexplicably in some “holes” and not others). nevertheless, for two years, every time we spoke about redoing the driveway, we spoke about Turfblock. however, when the time actually came, doubt started setting in. we were not sure we could deal with the maintenance and inconsistency. knowing we wanted a permeable option, my dear friend Jose—who I met my first day of architecture school, now many moons ago—owner of BrickPaver Group, suggested we use Rima pavers. Rima is an interlocking paver system that offers two installation options; “nub to block” which creates a seamless surface still allowing for percolation or “nub to nub” for a larger gap and increased permeability.
 
Photos courtesy of: www.sislersstone.com and www.tremron.com
 
the Turfblock allows for sod growth, increasing the green area of the yard; while the Rima offers lower maintenance and cleaner lines. we loved the aesthetics and functionality of both systems, so it was not an easy decision…


thankfully, making a decision on the walkway, was easier. we narrowed it down to two options [also illustrated above]; 24” x 24” precast concrete pavers or larger 24” x 48” poured-in-place “pavers.”

if you can’t wait till the next post to find out what we decided, follow us on Instagram! @ourreddoor

10.06.2013

{ BACK YARD: WALL PLANTERS }

…it’s been a while since we showed the back yard some love; and even though it still needs a lot of work, adding a little green is always a step in the right direction. as with every other wall in the house, we had three or four possible options for the rear wall of the garage; until we came across these awesome chalkboard wall planters and holder brackets from West Elm. we fell in love with these instantly. we liked the idea of creating a random pattern, so we used painters tape in different sizes, representing the various sized pots, to arrange the pattern on the wall.  

 
…even though we stalked three West Elm stores—and even had a very helpful sales person remove the pots and holder brackets off the store display installation, so we could buy them—we were short four small pots. knowing Rust-Oleum makes chalkboard spray paint, we thought we could create our own version for the small pots. we were right, you can’t tell the difference.


…loved adding succulents and herbs to our wall.


8.15.2013

{ KITCHEN: DESIGN: LAYOUT }


…we love to cook …well, Manny loves to cook, I love to do some of the prep work, prepare cold dishes and appetizers, plate, and stand around with a glass of wine while he does the cooking... so, we spend a lot of time in the kitchen. aside from needing a major make-over, the kitchen layout was not conducive to that. therefore, the goal was not only to update the kitchen, but to reconfigure the layout to make it work for us. in order to do this, the new design needed to:

·  “feel bigger,” as it is a small kitchen (120 SF);
·  be efficient;
·  provide more counter space and distinct prep areas;
·  provide more storage area;
·  provide functional storage areas;

…and last but, definitely not least, this one is difficult:
·  have the right balance between form and function

…redesigning the kitchen entailed:
·  inverting the location of the refrigerator and range. the previous layout felt small because every wall plane was broken up. this change creates an unobstructed wall, opening up the space; inverting these appliances also creates a better flow or “work triangle;”
·  removing the unnecessary soffit. the result of this was instantaneous; immediately it felt as though the volume had grown;
·  extending the partition wall to create additional counter area. creating a separate prep area, outside the triangle, eliminates  path conflicts and unintentional toe-stepping. as it turns out, there was no actual net gain in counter area [I had to do the math twice]; however, increasing their functionality, creates the illusion that counter area was added;
·  using every inch of space by designing floor-to-ceiling custom cabinets;
·  using open shelving in lieu of upper cabinets to maintain the “openness.” In spite of eliminating upper cabinets, the usable storage area increased by 40%;
·  shifting the location of the sink. in order to maximize storage areas, the dishwasher had to be moved to the exterior wall; in order for it to fit on that wall, the sink had to shift from its location (centered on the window). …and no, it doesn’t bother us that it is off-center. symmetry is overrated;
·  removing the ceiling fan. it had to be done; and
·  installing recessed light fixtures. the lighting placement was perfected by our light-savvy friend, Hector, whose only direction was “It needs to be bright and Manny does not want to see his own shadow as he is chopping away on the counter.” not only did he accomplish this, but he also successfully used lighting to emphasize design elements.

…take a look:


...existing plan:
...proposed plan (roll over the image):

...interior elevations:
 

7.06.2013

{ KITCHEN: BEFORE }

…a year and a half after buying the house, back in December, we finally started remodeling the kitchen. it’s been so long that even we have forgotten what it looked like. here it is was…


…the original plans indicate that this was possibly the original kitchen. as was customary in the 1950s—before we started living in our kitchens—it was designed to be partially enclosed, hidden  behind a wall and door. the wall featured an opening and formica bar overlooking the dining room. at some point in the last 60 years, this was changed to open up the kitchen entirely and a tall pantry cabinet was added next to the refrigerator. aside from cabinet refinishing, we think this might have been the only alteration.


4.08.2012

{ WIRED 2 }

…after undergrounding the electrical service entrance, our electrician installed a new sub panel which upgraded the house from 125 to 200 amps; this allowed us to make some much needed electrical and plumbing upgrades.

…outside, we replaced the existing exterior fixtures with energy-efficient spot lights which were wired though the attic; allowing us to remove all the ugly piping and giving us a nice clean look.

…we also replaced the old decorative lights with these great fixtures with an industrial feel.

…meanwhile, inside, we saved $600 by installing the decora style outlets, switches, and dimmers ourselves [Thanks again, again, and again, Dad! We told you he could do it all.]
…and in the bedrooms, we replaced the ceiling fans with these fantastic modern fans at an incredible price!


4.04.2012

{ HAPPY ONE YEAR }

… one year ago today we signed endless papers; turned a key; celebrated with friends and family; toasted with tequila; danced in an empty living room to the music in our heads; filled an air mattress; and started the journey to making this house our home.

…since then, we’ve been hard at work crossing items off our to-do list:

Prune out-of-control landscape
Replace the water heater
Upgrade electrical panel
Replace electrical outlets
Replace exterior light fixtures
Replace bedroom ceiling fans
Replace window sills
Replace broken window
Redo linen closet
Paint interior
Paint exterior and

…today we put a candle on a yummy Publix cheesecake, sang Happy Birthday (seemed like the most appropriate song), and looked forward to the years to come.

3.25.2012

{ WIRED 1 }

… we love our yard; it was one of the reasons we fell in love with the house. it’s large and has amazing potential, but it needed [needs]  significant  improvements. aside from the overgrown vegetation, we placed dealing with the electrical and cable service entrance at the top of our list. when we bought the house an array of cables and wires came in diagonally across the yard, sagged to a dangerous and illegal height, and created a major eye-sore.


…so, we decided to underground the service entrance; this meant we had to:

·         hire an electrician;
·         contact FPL (electricity provider) and AT&T (cable and internet provider) to understand the process and get approval for the undergrounding; 
·         get city permits and coordinate inspections for every step of the process;
·         purchase the pipe from FPL and coordinate for our electrician to pick it up; FPL provided the pipes for both, the electrical and the cable/internet connections;
·         find the hand hole to connect to. this took about two weeks; involved two visits from the FPL engineer (who could not find it); and even sneaking into an adjacent abandoned property; all, to no avail. eventually, my dad found it right where it should be, buried at the foot of the pole;
·         dig a long, deep trench (more on this later); and
·         coordinate installation with FPL, the city, and electrician.

Digging the Trench

…in order to underground the utilities a 30 inch deep by 80 foot long trench was needed; and in  an effort to save $1,200, we decided to dig it ourselves… well, with help from my dad and our friend Steve.

…we started by contacting Sunshine, a Florida service that identifies existing underground utilities. in theory, this should prevent you from running into issues as you dig. after getting the go-ahead from Sunshine, we identified the path of the trench and searched for obstacles along the way… and ran in to a pretty big one: a three foot foundation like concrete cylinder, which’s purpose is still a mystery. digging this out took some time and required serious man power…


…we then rented a nifty trench digger called a Ditch Witch ($90 for the weekend) and started on the trench… and a whole five minutes later we busted the water main. yes! the water main. it also ran diagonally across the yard and Sunshine failed to identify it. you can imagine the overwhelming sense of panic as we watched water gush out faster than you can imagine. Steve put all his strength into closing the main valve, which had not been touched in years, and the water finally stopped pouring in. since emergency plumbing services are not cheap, we are grateful for my do-it-all dad who fixed the busted pipe and got water running in our house again.


…meanwhile, Manny and Steve focused on digging the rest of the trench. because of our proximity to the bay, they were mostly digging out sand. this made using the Ditch Witch a breeze, however, it also meant that the trench would collapse easily and in order to get the full 30 inch depth, the rest had to be done by hand.


…two days later, the electrician laid the pipe and we got to cover the trench. as if all the hard work never happened.


Undergrounding the Electric Service

…after a lot of coordination, the day of the installation everything ran smoothly. FPL disconnected the service, ran the new wiring through the buried pipe, and the electrician connected it to our brand new panel. within two hours, the hanging cables were gone and we had power!

Undergrounding the Cable/Internet Service

…we have two main choices for cable and internet service: Comcast and AT&T. after Comcast failed to show up to two scheduled appointments and offered no explanation, we decided to go with AT&T’s U-verse. we explained our desire to underground the service and that the pipe and trench would be provided. since all they would have to do was disconnect the service, put the cable through the pipe, and reconnect, they said they would be happy to do it. it all seemed simple enough… well, after the first visit from a technician who couldn’t do anything because he apparently was answering a call for a cable that was “on the ground,” we knew we had a problem. after endless calls, visits from another 3 technicians, and my frustrated threat to cancel the service if this wasn’t done, a very helpful fifth technician said he would try. however, it turns out that one of the previous technicians had pulled out the string that ran inside the pipe, without this, the cable could not be pulled though. sensing my frustration, Technician Number 5 came up with the ingenious plan to pull the string through the pipe using our shop vacuum. minutes later the cable was pulled through and our service was connected.

…four months after the process began, our backyard was cable and wire free!